Member Management
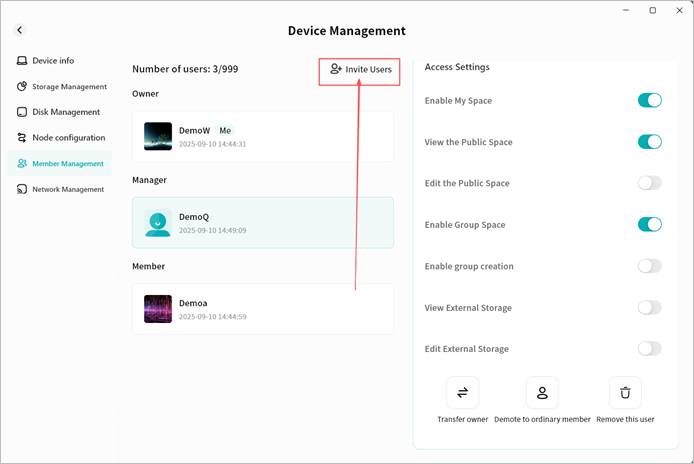
On the Member Management page, you can manage all members and their permissions, as well as invite others to join the device.

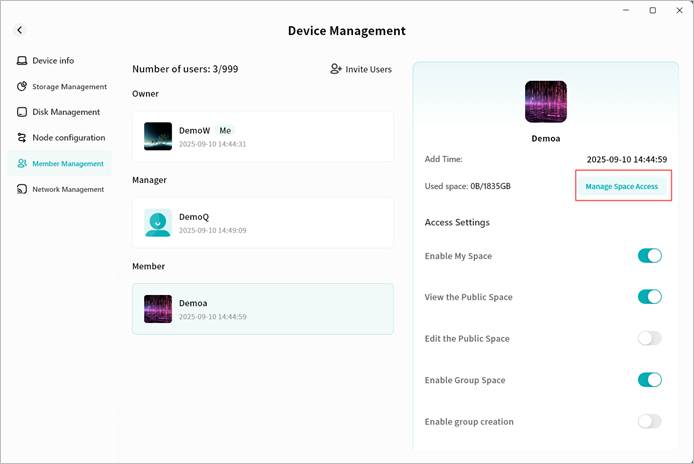
① Owner: Displays the owner’s nickname and the time of device binding.
② Administrator: Displays all administrators’ nicknames and their binding times.
③ Member: Displays all members’ nicknames and their binding times.
④ Permission Details: Shows your specific permissions on this device.
⑤ User Count: Displays the number of users currently bound to the device and the maximum number of users allowed.
⑥ Invite Users: Generates an invitation code to invite others to join the device.
Note: Only owners and administrators can view and configure member permissions. Members can only view their own permissions and cannot modify them.
User Roles in Device Binding
In Weline Pro, accounts are classified into different roles based on their permissions:
- Owner: The first account to bind the device. Has full control over the device.
- Administrator: A role assigned by the owner to a member account. Has most device management permissions and can configure member permissions.
- Member: Accounts invited to join the device default to member role, with only basic permissions.
Permission Description
The differences in permissions between user roles are shown in the table below:
| Permission Item | Owner | Administrator | Member |
|---|---|---|---|
| Manage account storage limit | √ | √ | |
| Read/Write My Space | √ | √ | √ |
| View Public Space | √ | √ | √ |
| Edit Public Space | √ | √ | |
| Use Group Space | √ | √ | √ |
| Create Groups | √ | √ | |
| View External Storage | √ | √ | |
| Edit External Storage | √ | √ | |
| Transfer Ownership | √ | ||
| Assign Administrator | √ | ||
| Remove Users | √ | √ |
Adjust Member Permissions
You can configure detailed permissions for different members.
- Select a member account, then in the Permission Details section on the right, enable or disable specific permissions for that member.
- Owners can configure permissions for all users.
- Administrators can configure permissions for member accounts.

Storage Quota Management
You can configure storage limits for different members:
- Owners can set storage limits for all users.
- Administrators can set storage limits for member accounts.
- Select a member account, then in the Permission Details section on the right, click Manage Space Access.
- In the pop-up window, configure the available storage limit for the account:
- No limit: No restriction on the member’s storage usage.
- Percentage: Allocate a percentage of the device’s total capacity.
- Customized Size: Set a fixed maximum capacity (in GB).
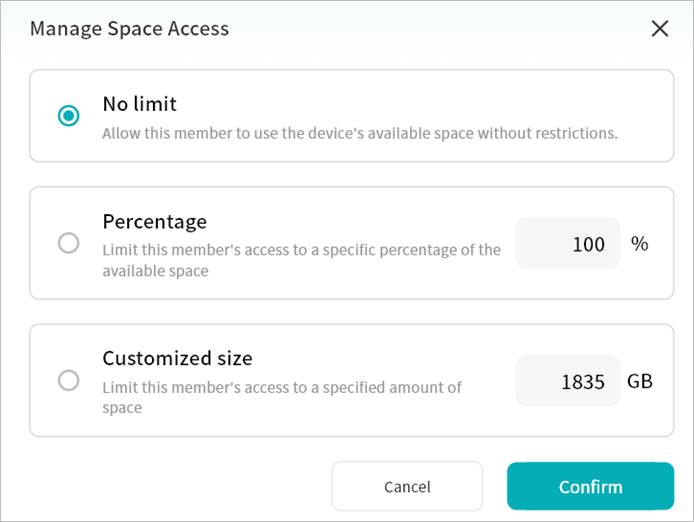
Once configured, the member will not be able to exceed the assigned quota.
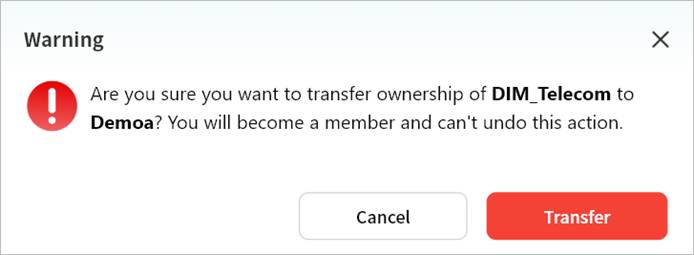
Transfer Owner
The owner can transfer device ownership to another member account.
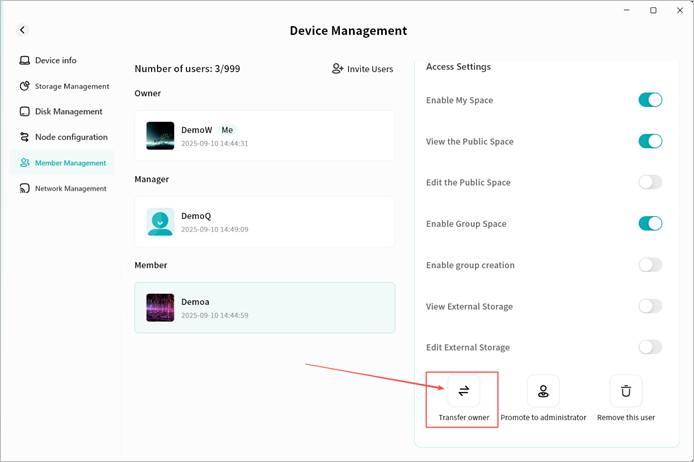
- Select a member account, then in the Permission Details section on the right, scroll down and click Transfer Owner.
- In the pop-up window, click Transfer.
After transfer, the device will briefly go offline and then reconnect to update internal permission logic.
Once back online, your account will become a member, and the selected account will become the device owner.
Administrator Promotion and Demotion
- Promote Member to Administrator
- Select a member account, then in the Permission Details section on the right, scroll down and click Promote to Administrator.
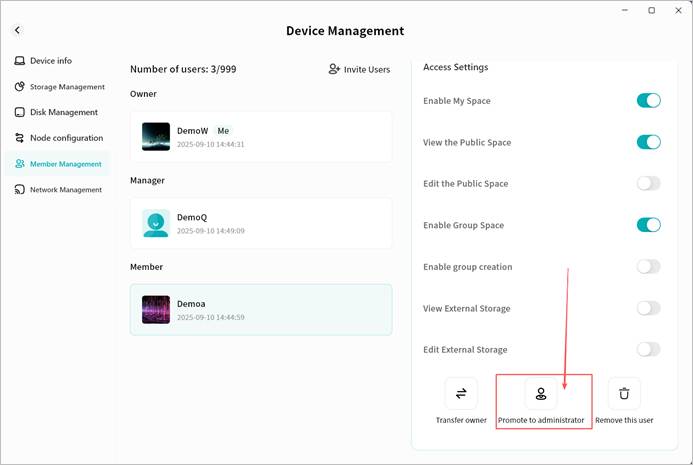
- The device will briefly go offline and then reconnect. After reconnection, the account will appear as an administrator.
- Demote Administrator to Member
- Select an administrator account, then in the Permission Details section on the right, scroll down and click Demote to Member.
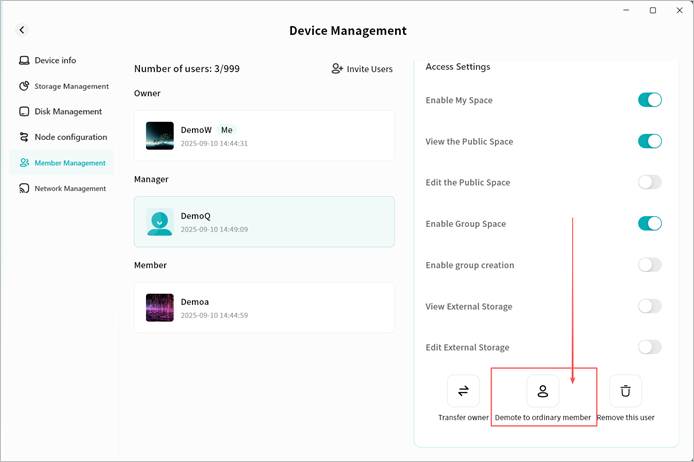
- The device will briefly go offline and then reconnect. After reconnection, the account will appear as a member.
Remove User
You can remove a user to unbind them from the device. After removal, the user will no longer see the device.
- Owners and administrators can perform removals.
- Owners can remove administrators and members.
- Administrators can remove members.
Steps:
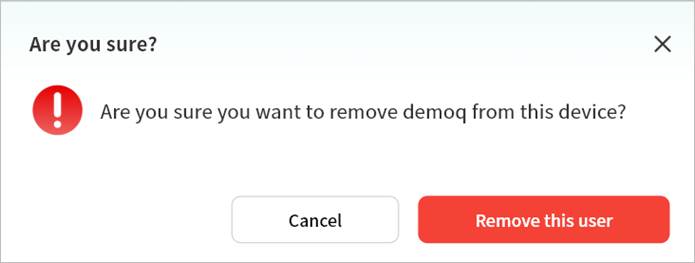
- Select a user account, then in the Permission Details section on the right, scroll down and click Remove This User.
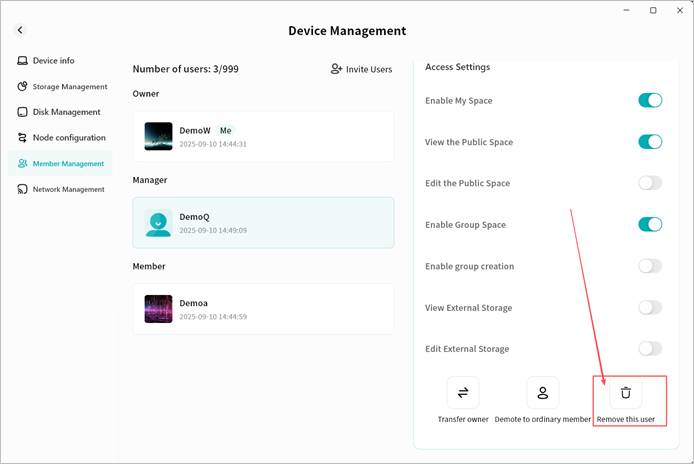
- In the pop-up window, click Remove This User. After system processing, the user will be removed from the device. When a user is removed, their personal storage data will also be cleared to free up space.
Invite Users
You can invite others to join the device via the Member Management page.
- Go to Device Management > Member Management and click Invite Users.
- The system will generate an invitation QR code window. You can send the QR code or invitation code to others.
- On mobile: Scan the QR code with the Weline Pro mobile client.
- On desktop: Enter the invitation code in the Weline Pro desktop client.
(See the Add Device section for details on joining a device.)
Options:
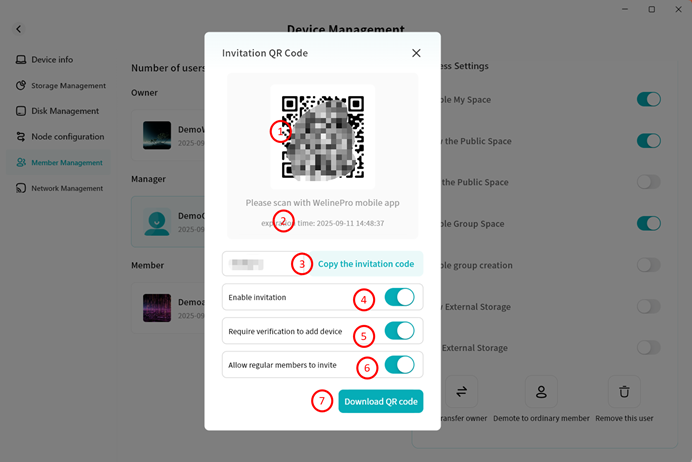
① QR Code Display: Shows the invitation QR code.
② QR Code Expiry: Valid until the specified time, after which it cannot be used.
③ Invitation Code: Equivalent to the QR code for invitation purposes.
④ Enable Sharing: Must be enabled to generate the invitation QR code.
⑤ Require Verification to add device: If enabled, owner/administrator approval is required before new users can join.
⑥ Allow regular Members to invite: If enabled, regular member accounts can also invite others.
⑦ Download QR Code: Save the QR code image to your computer’s download directory.
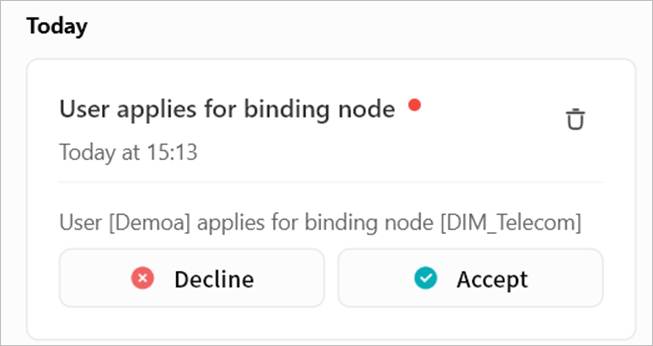
- If Verification Required is enabled, when someone applies to join, the owner/administrator will see a notification in the system. Only after clicking Accept will the user be bound to the device.