Member Management
On the Member Management page, you can manage all members of the device, assign roles and permissions, and invite others to join.
- View Member List: See all accounts currently bound to the device.
- Assign Roles: Set different roles for members, including Administrator and Member.
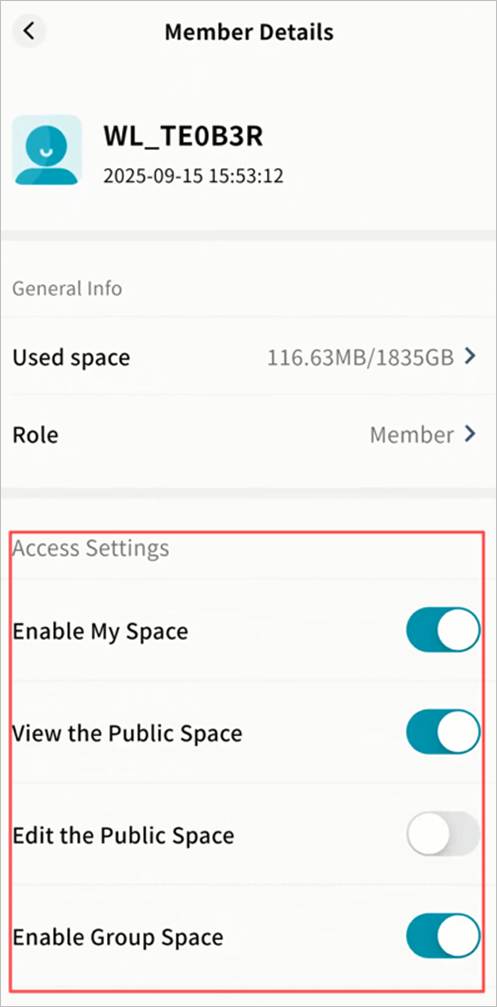
- Permissions: Configure specific permissions for each member, such as read/write access to Public Space.
- Invite Users: Generate an invitation code to allow new members to join the device.
Note: Only the Owner and Administrators can view or set member permissions. Members can see only their own permissions and cannot modify them.
User Roles
Weline Pro defines three roles with different levels of control:
- Owner: The first account to bind the device. Has full administrative privileges.
- Administrator: Assigned by the Owner. Has most management permissions, including setting member permissions.
- Member: Invited users who join the device. Has only basic permissions.
Role Permission Matrix
The differences in permissions between user roles are shown in the table below:
| Permission Item | Owner | Administrator | Member |
|---|---|---|---|
| Manage account storage limit | √ | √ | |
| Read/Write My Space | √ | √ | √ |
| View Public Space | √ | √ | √ |
| Edit Public Space | √ | √ | |
| Use Group Space | √ | √ | √ |
| Create Groups | √ | √ | |
| View External Storage | √ | √ | |
| Edit External Storage | √ | √ | |
| Transfer Ownership | √ | ||
| Assign Administrator | √ | ||
| Remove Users | √ | √ |
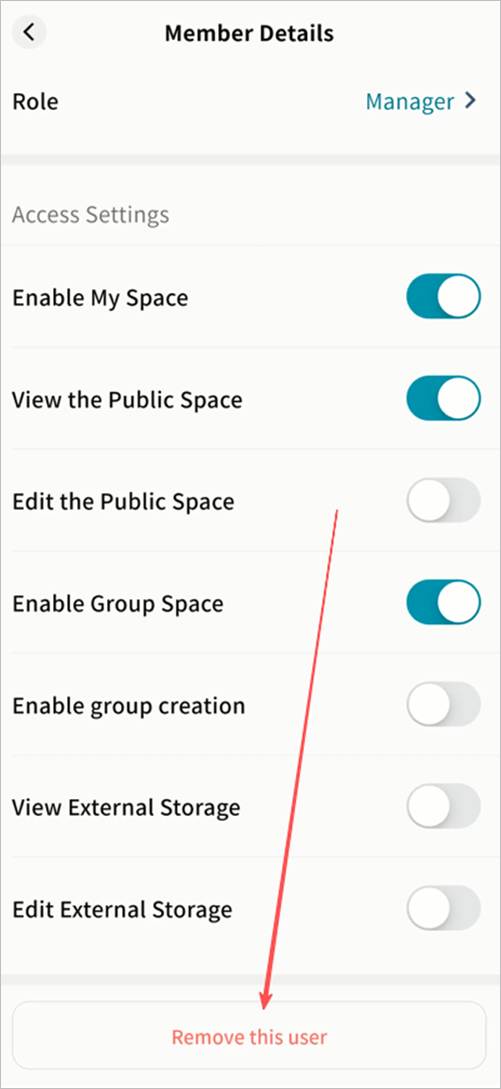
Adjusting Member Permissions
- The Owner can set permissions for all users.
- Administrators can set permissions for Members.
- To configure permissions, select a member and adjust their detailed permission options in the right-hand panel.
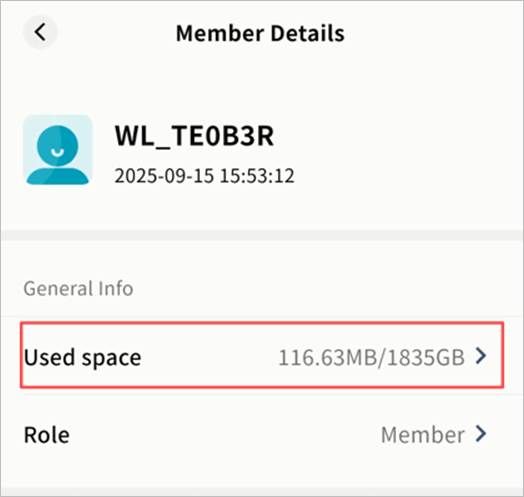
Storage Quota
You can set the maximum storage a member can use.
- Owners can set quotas for all users.
- Administrators can set quotas for Members.
Steps:
- In Member Management, open a member’s detail page and click Storage Usage.
- On the Storage Authorization page, choose one of the following:
- Unlimited: No limit on storage.
- Percentage: Allow the user to use a set percentage of total device capacity.
- Custom Size: Define a maximum limit in GB.
Once set, the user cannot exceed the allocated storage.
Transfer Ownership
The Owner can transfer device ownership to another member.
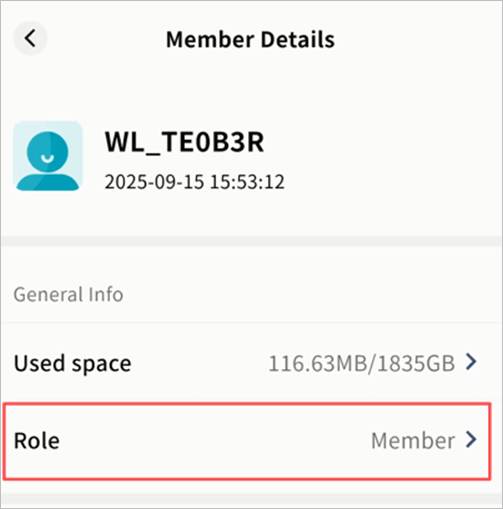
- In Member Management, open a member’s detail page and click Role.

- On the Role Settings page, select Owner and click Update.
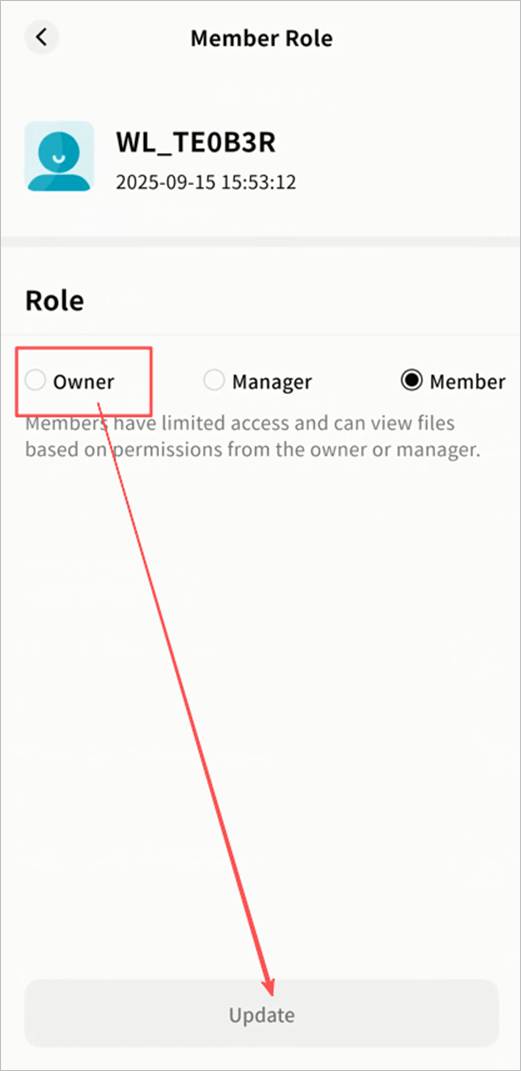
- In the confirmation dialog, click Transfer.
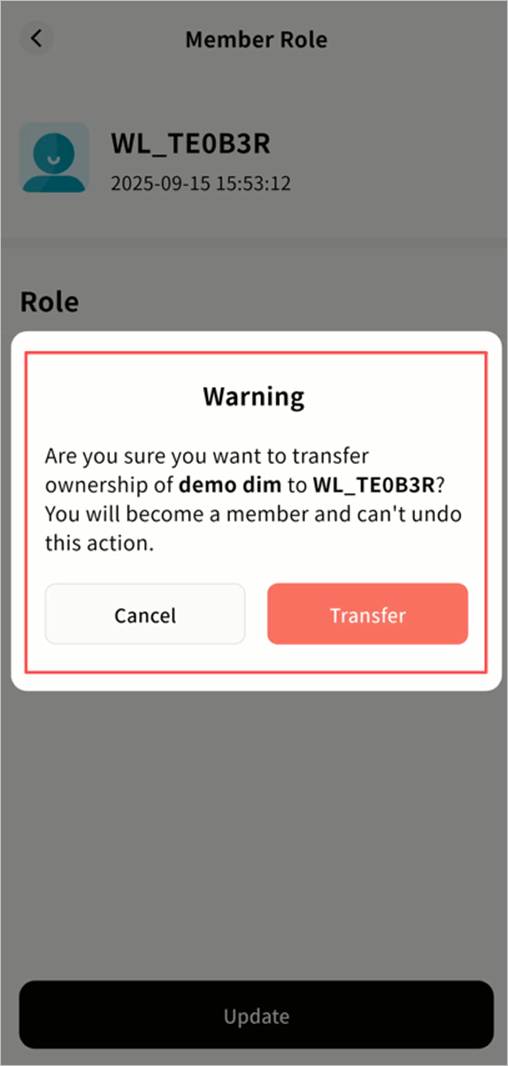
Note: After transferring ownership, your account will become a regular Member.
- The device will go offline and then back online to process internal permissions. Afterward, the new account will be listed as Owner.
Admin Promotion and Demotion
Promote Member to Admin
- In Member Management, open the member’s detail page and click Role.
- Select Manager and click Update.
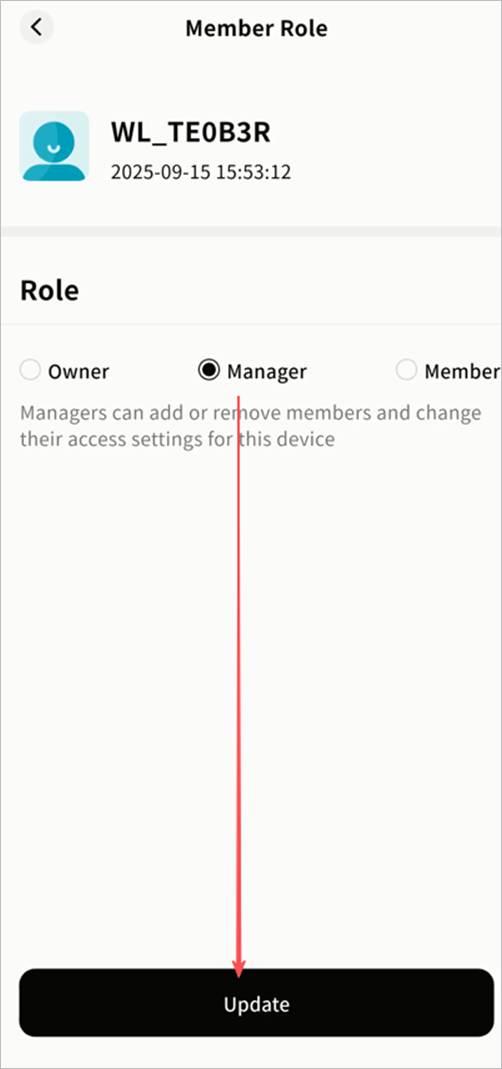
- The device will restart its permissions cycle (offline → online). The member will now appear as an Administrator.
Demote Admin to Member
- In Member Management, open the admin’s detail page and click Role.

- Select Member and click Update.
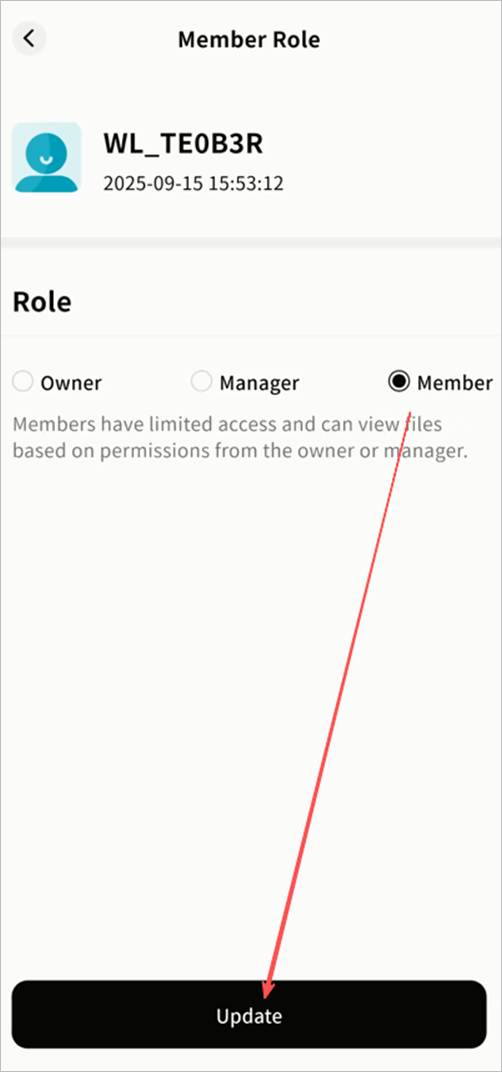
- The device will restart its permissions cycle (offline → online). The user will now appear as a Member.
Remove Users
Owners and Administrators can remove users from the device.
- Owners can remove Admins and Members.
- Administrators can remove Members only.
Steps:
- In Member Management, open the member’s detail page and scroll to the bottom.
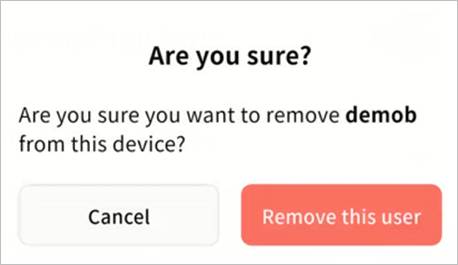
- Click Remove this user, then confirm.
- The user will be unbound from the device.
- Their personal space data on the device will be cleaned up to free storage.
Invite Users
Owners and Administrators can invite new members to join the device.
Steps:
- In Member Management, click Invite User in the top-right corner.

- A QR code and invitation code will be generated:
- Enable Sharing: Must be enabled before generating the QR code.
- QR Code: Can be scanned within its validity period to join the device. You can also save it to your gallery or share it through other apps.

- Invitation Code: Equivalent to the QR code. Click Copy to share it directly.
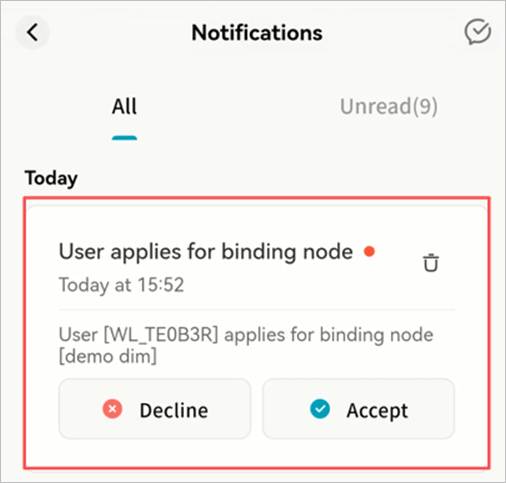
- Verification Required: If enabled, new join requests must be approved by the Owner or Administrator in the Notifications panel.
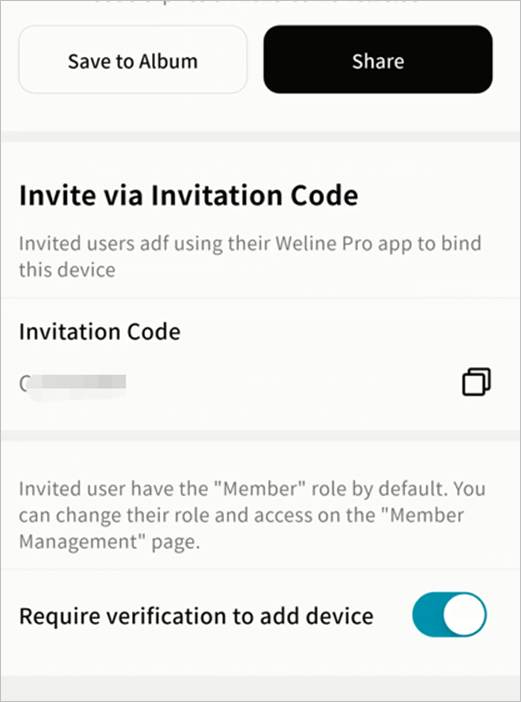
- If verification is required, the Owner/Administrator will see a request notification and must click Accept for the new member to join.